 |



|
#1
 09-27-2009, 05:30 PM
|
||||
|
||||
 Touch Pro 2 Basic Disassembly Pictures (56k warning)
I was documenting the disassembly of a Touch Pro 2 (mine as it turns out. :P) for reference, and I've utilized so many cabs/roms from the other members of this site, I figured I'd post them up if anyone was curious and try to give back to this great community. :headbang:
Disclaimer: I tried to document this disassembly as best I can, if you're not comfortable disassembling your phone, do not attempt to do so, and do not blame me when you break something. :mrgreen: 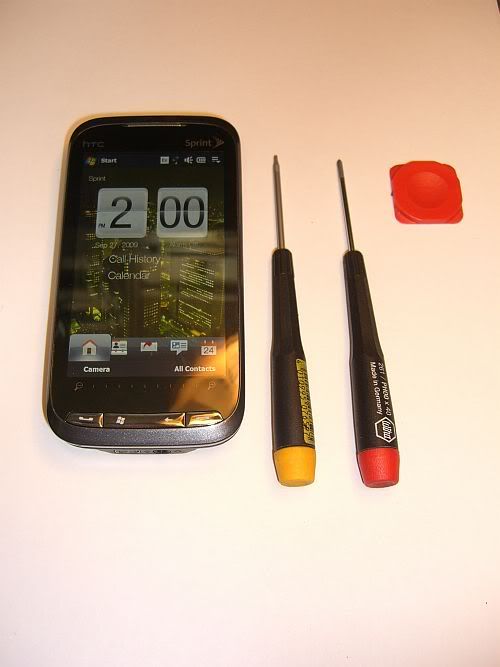 Tools required: T5 Torx driver, Philips 00 screwdriver and plastic pry tool. (You can get away with using your fingernails instead, although it may be more difficult.) 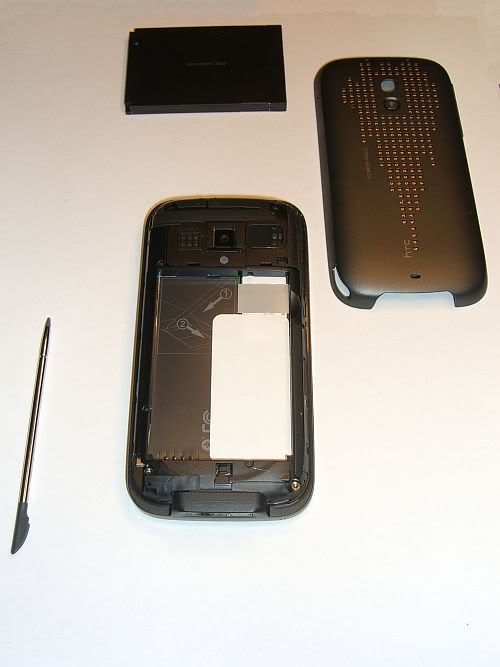 Remove battery back door, stylus and battery as well as micro SD card if inserted. (Not pictured.) 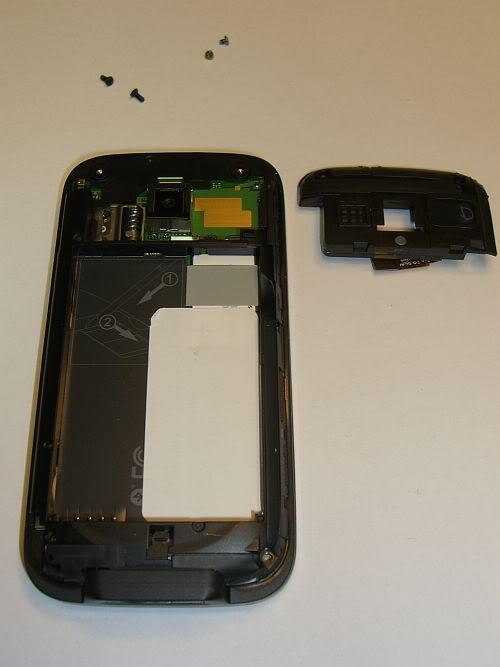 Using your T5 driver, remove the four screws at the top and bottom of the unit. Note the longer length screws are from the top of the unit, the smaller length are for the bottom. Working from the top, slowly pry back the speaker module around the camera and remove the flex ribbon connector from the board. 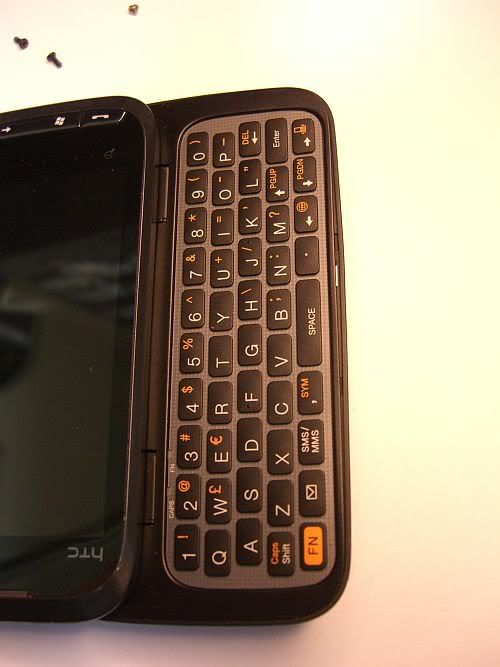 Flip the unit over and using your pry tool or finger nail, gently pry away the bottom plastic from around the keyboard. 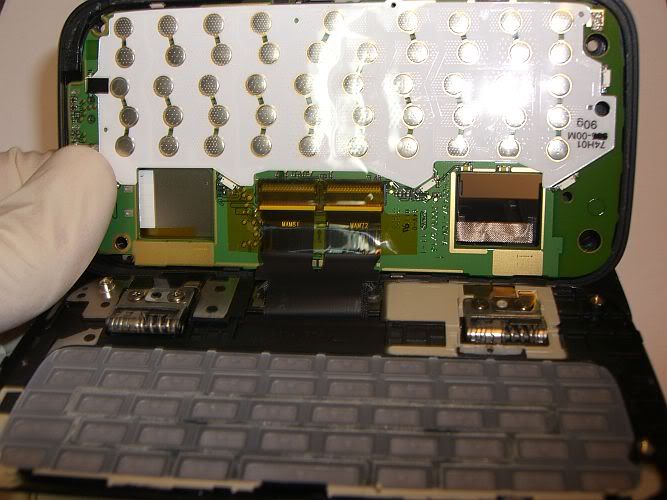 Carefully pull the keyboard plastic away from the board. There is a bit of adhesive holding it, take care not to deform the keyboard. Remove the tape from the flex ribbon connector and disengage the catches on both connectors and remove the ribbons. Top flip disassembly: 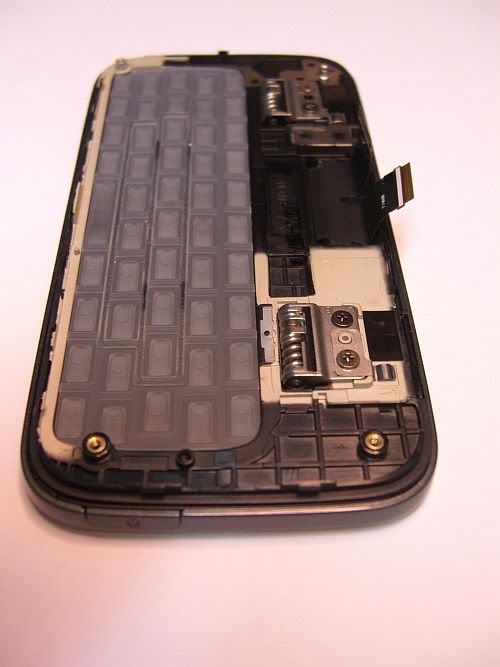 Remove the four Philips screws from the hinge assembly. Note the placement of the metal retainer on top of the bottom screw on either hinge. (Seen in above photo on the bottom screw and below photo removed at top of photo.) 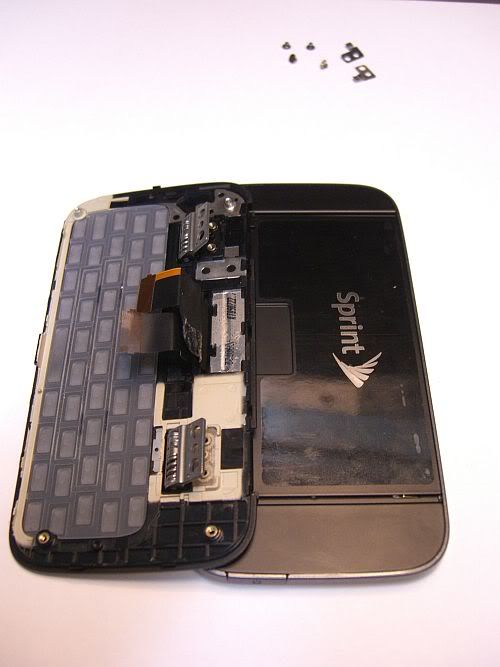 Lift the hinges up and arefully pull back the flex ribbon as well as the fabric beneath it. Both are held in place with adhesive. Gently lift the keyboard plastic off of the hinges and set aside. Taking care not to damage the ribbon cable when pulling through the slit in the keyboard. 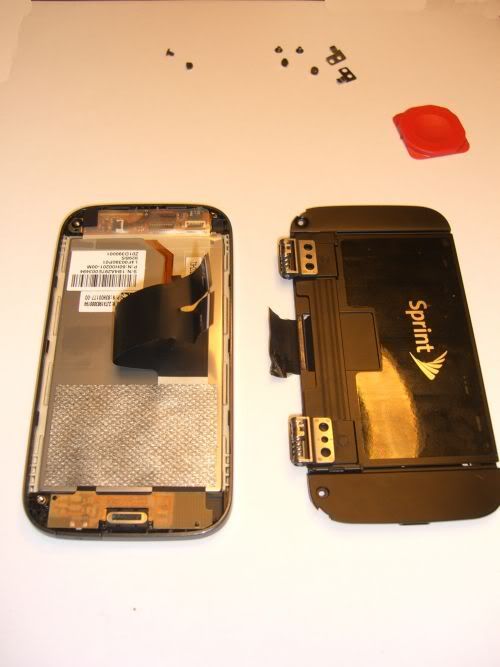 Remove the two screws on the left side and begin to slowly work your pry tool around the edge, between the top plastic and bottom piece. The bottom piece is metal and is easily deformed, so take care when disengaging the plastic catches around it. Once all catches have been disengaged, pull top half off bottom metal piece. And that's it! You've partially stripped down your Touch Pro 2! Note for reassembly: You will need to hold the slider assembly back a bit to open the "door" that is in place for the flex ribbon to pass through. Make sure you have the fabric pulled through as well. originally found here: Codehttp://forum.ppcgeeks.com/showthread.php?t=87533 
|





| The Following 3 Users Say Thank You to D/\SH For This Useful Post: | ||
  |
| Tags |
| 56k, basic, disassembly, pictures, pro, touch, warning |

«
Previous Thread
|
Next Thread
»
| Currently Active Users Viewing This Thread: 1 (0 members and 1 guests) | |
| Thread Tools | Search this Thread |


|
|

 Similar Threads
|
||||
| Thread | Thread Starter | Forum | Replies | Last Post |
| Basic sprint touch pro 2 Question | kaos | HTC Touch Pro 2 | 14 | 10-24-2009 02:34 AM |
| Widgets pro plus 'basic' and 'ultimate' for spb mobile shell 3.01 final | D/\SH | Mobile Locker | 1 | 10-08-2009 10:46 PM |
| imov Messenger Basic v2.21e | D/\SH | WM And PPC Applications | 0 | 05-29-2007 03:39 PM |
All times are GMT -4. The time now is 06:01 AM.